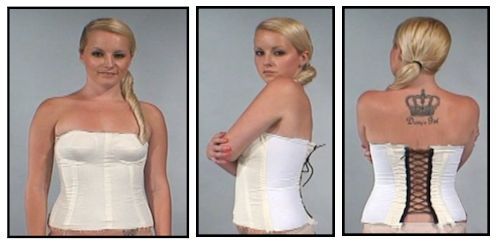
The strapless pattern is for a corset that extends above the bust. These instructions are a continuation of the procedures described for the rib cage portion of the corset in The Underbust Pattern. There are three basic steps to follow.
To create a Strapless Corset, you will need the following materials and tools. These instructions show how to use an optional powernet in the side back panel to create a corset that is less restrictive than a corset that has no stretch.
Use the steps below to create a body wrap starting from an Underbust Body Wrap. The first video for each step shows the process as a two-person operation. The second video shows it as a do-it-yourself, DIY, process.
Apply Press'n Seal to the body and reinforce it with masking tape.
Draw the desired design lines on the masking tape.
Determining the seam lines is best done before you remove the body wrap. This way you can easily follow the changes in the contour of the body. When this is a two-person operation, draw in the full design lines. When you are doing it yourself, just make marks at key reference points, then complete the lines after you have removed the body wrap.
Two Person Design Lines
Draw a horizontal line at the full bust level.
Extend the center front line to the above the bust level.
Draw a vertical line for the apex of the bust location.
Extend the seams from the body up to the top of the body wrap.
Use an underwire to shape the corset cup seam.
Place a narrow strip of velcro around the body above the bust and draw in the top of the Strapless Corset.
Paper patterns will be a more stable record of the corset shapes than the Press'n Seal body wrap. After you have removed the body wrap, use the steps below to create the paper patterns.
Reinforce the inside of the body wrap with masking tape as described in The Underbust Pattern.
Add labels and sewing notches to each shape, then cut the body wrap along the seam lines.
To create the paper patterns, transfer the shapes from the body wrap.
Label and Cut the Body Wrap
Before you cut the body wrap, label each section and add sewing notches. The sewing notches are important because they are the most reliable fixed reference when you start to cut the body wrap apart. If you are working from a DIY body wrap, draw in complete design lines.
Label the sections of the cup "A," "B," "C," and "D."
Number the sewing notches where the cup intersects with the body of the corset.
Cut the body wrap leaving the cup as a single piece.
Add sewing notches to the cup and number them.
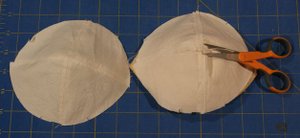
Cut the cup along the seam lines.
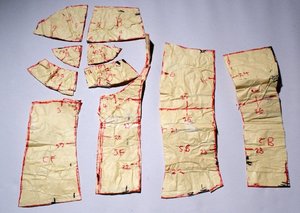
Strapless Body Wrap
Corset Cup
The DIY Body Wrap
Label the sections of the cup "A," "B," "C," and "D."
Number the sewing notches where the cup intersects with the body of the corset.
Cut the body wrap leaving the cup as a single piece.
Add sewing notches to the cup and number them.
Cut the cup along the seam lines.
Add any additional seam lines that are required until all the cup pattern pieces lay flat.
Strapless DIY Body Wrap
Use the Body Wrap to Create Paper Patterns
The body wrap shapes can now be traced to create paper patterns. This includes verifying the length of the seam lines. The final step is to add seam allowances. If you use 3/4" (18 mm) seam allowances, the seam allowances can be used as channels for 1/2" (12 mm) boning in fitting a muslin mock-up. Use 1/4" (6 mm) seam allowances for the cup.
The Bra Cup Pattern
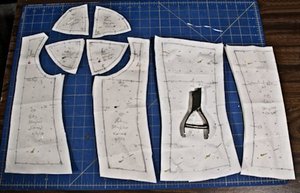
Trace the underbust pattern created in The Underbust Pattern on pattern paper. Leave enough room between the pieces for seam allowances. The strapless shapes may require more space between the pattern pieces.
Lay out the strapless body wrap pieces matching the rib cage line of the underbust pattern.
Trace the shapes of the strapless body wrap pieces to the top of the underbust pattern including the sewing notches.
Label the pattern pieces.
Add 1/4" (6 mm) seam allowances to the corset cup patterns.
Add 1/2" (12 mm) seam allowances to the top of the corset.
Add 3/4" (18 mm) seam allowances to all other seams.
To verify that the pattern shapes are correct, create a muslin mock-up of the Strapless Corset. For sewing the rib cage portion of the garment, including adding boning, see the instructions in The Underbust Pattern.
The strapless corset in this example is made with a powernet side back panel for wearing comfort.
The final step in creating the patterns is to fit the muslin mock-up. There may be little or no fitting required. During this process, you will be able to see how the fabric works on the body so that you can make refinements for any design you may wish to create.
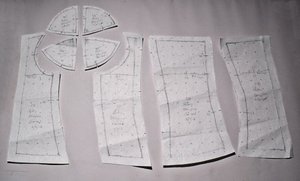
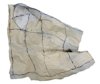 Body Wrap
 Paper Patterns
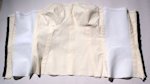 Muslin Mock-Up
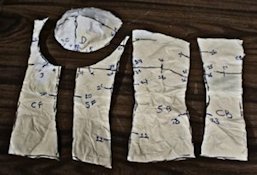 Strapless Body Wrap
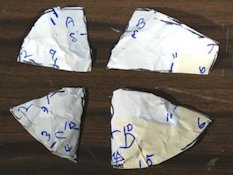 Corset Cup