These instructions show how to create two variations of the Strapless Corset. The first corset shows how to restyle the lines of the bra cup. The second corset shows how to combine the pattern pieces to create a Princess Seam that eliminates the need for an underwire.
The first step is to create a paper copy of the sloper pattern so you can make adjustments for a specific design and record the information used to create the corset. Do not copy the seam allowances from the sloper, only the sewing lines.
For the Bra Cup Corset, the first steps are to adjust the cup pattern, then restyle the design lines of the cup. You may need to make adjustments to the patterns for the body of the corset.
Preparing the Bra Cup
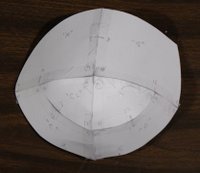
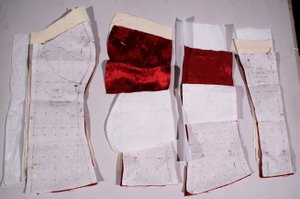
Copy the sloper bra cup patterns on to posterboard. Include the labels and the sewing notches.
Cut out the posterboard along the seam lines.
Matching the sewing notches, tape the posterboard together.
Posterboard Bra Cup
Restyling the Bra Cup
The bra cup for the sloper uses seam lines to identify the horizontal full bust level and the vertical bust apex. The instructions below show how the cup may be redesigned with different seam locations.
Restyling the Bra Cup
Draw in new seam lines on the posterboard copy.
Cut out the posterboard along the new design lines.
Verify that the new pattern shapes will lay relatively flat.
For any pattern shapes that do not lie flat, add additional seam lines.
To verify the shaping, trace the new pattern shapes on to posterboard and tape them together.
After the desired shaping is achieved, transfer the posterboard shapes to pattern paper.
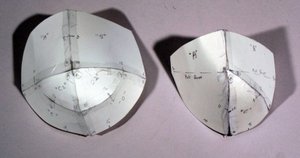
Original Sloper Bra Cup & Restyled Bra Cup
Adjusting the Patterns
In addition to restyling the cup, other seam lines for the corset can be changed.
Transfer sewing notches from the body of the pattern to the bra cup patterns.
Add 1/4" (6 mm) seam allowances to the bra cup patterns.
Add 1/2" (12 mm) seam allowances to center front, side front, side, and side back seams.
Add the desired edge allowances to the top and bottom of the patterns.
Cut out all the patterns in fashion fabric.
Cut out the bra cup, center front, side front and center back patterns in lining fabric.
Cut out the side back pattern in powernet.
Cut out 4 center back panels in fusible interfacing.
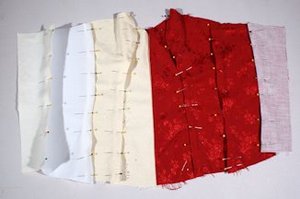
Use the grid on a rotary cutting mat to layout the fabric. If the fabric is folded, verify that the selvedge edge is parallel to the fold of the fabric.
With the fold along the vertical edge of the cutting mat, trim the top of the fabric using the horizontal lines of the cutting mat as a guide.
Measure down from the top edge of the fabric the width of the desired edging strip, then cut.
Because the fashion fabric is a combination of coutil and powernet, the construction of the corset's body follows the procedures for a single layer corset described in Basic Construction.
The only new techniques for sewing the bra cup into the body of the garment and adding an optional underwire. The bra cup needs to be sewn into the corset before boning is added. This also means that the top edging needs to be added first, then the boning, followed by the bottom edging.
Sewing the Bra Cup
After the body, including the boning channels, is sewn, verify that any boning channel intersecting with the underwire seam does not extend into the seam allowance for the bra cup.
Pin the bra cup into the body of the garment, then sew with a 1/4" (6 mm) seam. This tends to work best when the cup is held against the free arm of the sewing machine.
Important Note: Before proceeding further, verify the fit of the corset for this combination of fabric.
Hand baste underwire casing to the underwire seam allowance so that the seam allowance will be sandwiched between the casing and the body of the corset.
Trim the underwire seam allowance.
Insert the underwires into the casing.
Sew the edge tape to the top of the corset as described in Construction Basics Adding Spiral Steel Boning.
The Princess Seam Corset has a side front seam that runs from the top of the corset through the apex of the bust to the bottom edge of the corset. It replaces the shaping of the underwire seam.
To first step is to create a paper copy of the sloper pattern so you can make adjustments for a specific design and record the information used to create the corset. Do not copy the seam allowances from the sloper, only the sewing lines.
For the Princess Seam Corset, use the bra cup pattern pieces to change the shape of the center front and side front patterns for the princess seam. You may need to make adjustments to the patterns for the remainder of the corset.
Restyling for a Princess Seam
Use pattern paper to copy the body of the Strapless Corset sloper. Do not include the seam allowances.
Use a separate piece of pattern paper to copy the bra cup of the sloper and cut it apart along the seam lines.
Create the princess seam by placing the bra cup patterns on the center front pattern making sure they match the side front, full bust, and apex sewing notches. Then draw dotted lines to indicate their location.
Repeat Step 3 for the side front pattern.
Completing the Pattern
Once the princess seam is established, adjust the side back and center back patterns as necessary.
Adjust the top of the side back and center back patterns to match the side front pattern.
Add 1/2" (12 mm) seam allowances to the center front, princess, side, and side back seams.
Cut out all the patterns in fashion fabric.
Cut out the center front, side front, and center back patterns in lining fabric.
Cut out the side back pattern in powernet.
Cut out 4 center back panels in fusible interfacing.
To create a double layer corset, the first step is to add the opening busk as described in Construction Basics Inserting the Opening Busk. The only difference is that the facing described in those instructions becomes a lining fabric. For the example shown here, the knob side of the busk is reinforced with fusible interfacing to stabilize the satin weave.
Once the opening busk has been installed, the body of the corset can be sewn. For double layer corsets, the grommets are installed after both sides of the body of the garment are sewn together.
1. Pin the corset, right sides together, then sew along each seam location.
2. Press open the seams, then trim the two sides of the seam allowances to different widths. If one side is 1/2" (12 mm), the second side should be 3/8" (9 mm). This is referred to as grading the seam allowances.
3. Press the seam allowances of the side seam toward the back and the side back toward the front.
4. Press the lining of the princess seam toward the back but press the fashion fabric of the princess seam open. This will add an additional layer of fabric to cover the boning.
5. Hand baste the seam allowances in place.
6. Add the grommets to the center back panels as described in Construction Basics Adding the Grommets.
Important Note: Before proceeding further, verify the fit of the corset for this combination of fabric.
Boning can now be added to the corset. To create the necessary channels for the boning, sew the fashion fabric to the lining.
For this example, 1/2" (12 mm) spiral steel boning is used at the side and side back seam locations with 1/4" (6 mm) boning on either side of the princess seam. Additional 1/2" (12 mm) boning can be added to the middle of the side front and side back panels.
Pin the fashion fabric seams so they are directly over the lining seams.
Make the boning channel's first edge by top stitching 1/8" (2 mm) next to the side back and side seams.
Insert a length of boning next to the stitching from Step 2, then sew the other side of the boning channel.
To minimize the bulk of the seam allowance over the bust, sew a 2 mm wide, 2 mm long zigzag stitch on the lining close to the princess seam, then trim off the excess seam allowance.
Sew the first edge of the princess seam boning channels on both sides of the seam.
Pin a length of 1/4" boning next to the stitching from Step 5, then sew the second side of the boning channel. This creates boning channels on both sides of the seam.
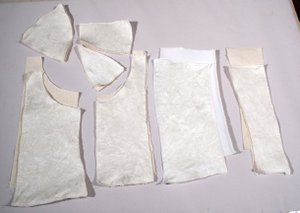
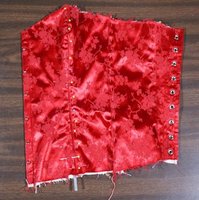
Boning Pinned in Place
Finishing the Corset
For this example, fashion fabric tape is used for the edging. The fashion fabric is a stretch fabric so it can be cut along the straight of the goods. Use a 1mm zigzag stitch to accommodate the stretch of the side back panel.
Use a 1 mm wide zigzag stitch to sew the fashion fabric edging tape to the top of the corset.
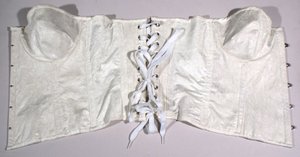
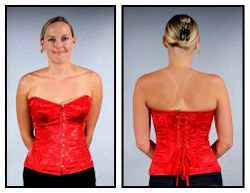
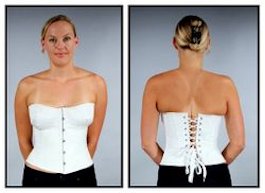 Bra Cup Corset
 Princess Seam Corset